How to Bulk Upload New Assets
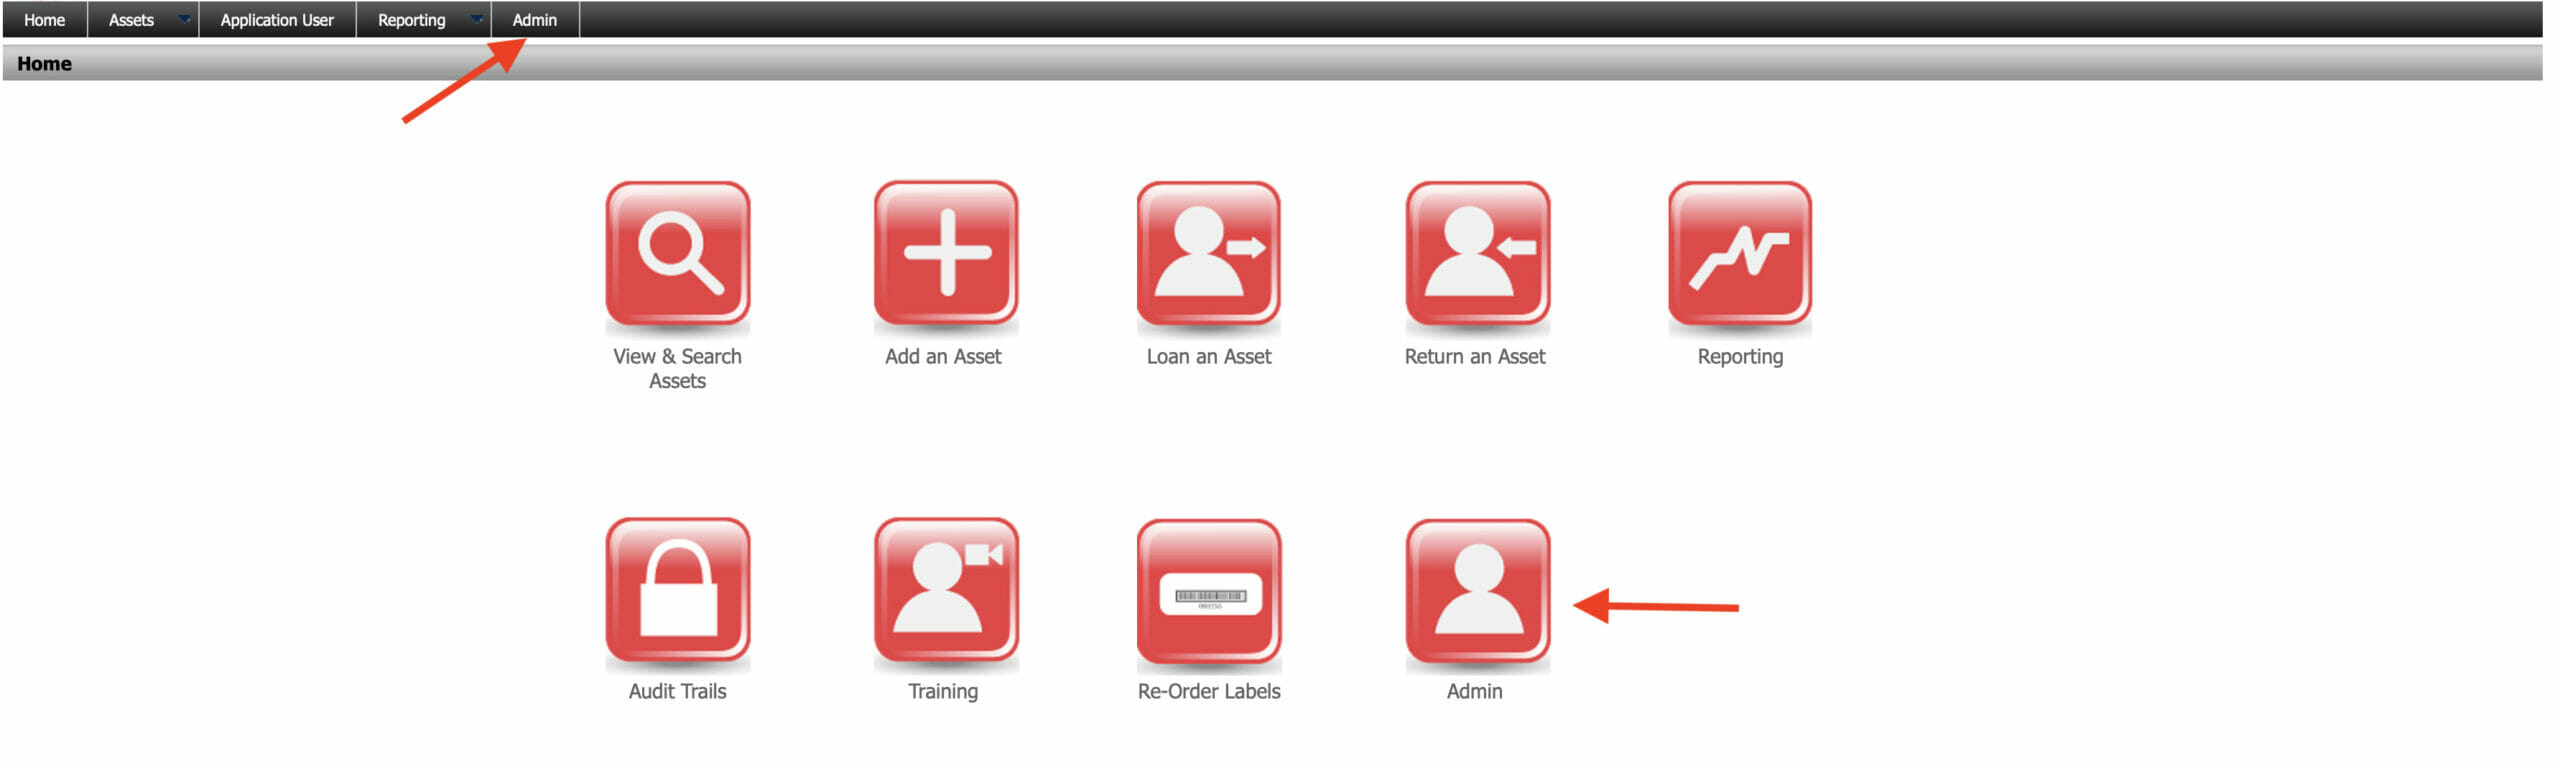
Assets can be imported into AssetGuard Pro in bulk. A user must be set as an administrator to have access to this function. First, navigate to the Admin section of the system using either the top menu bar or the home screen.
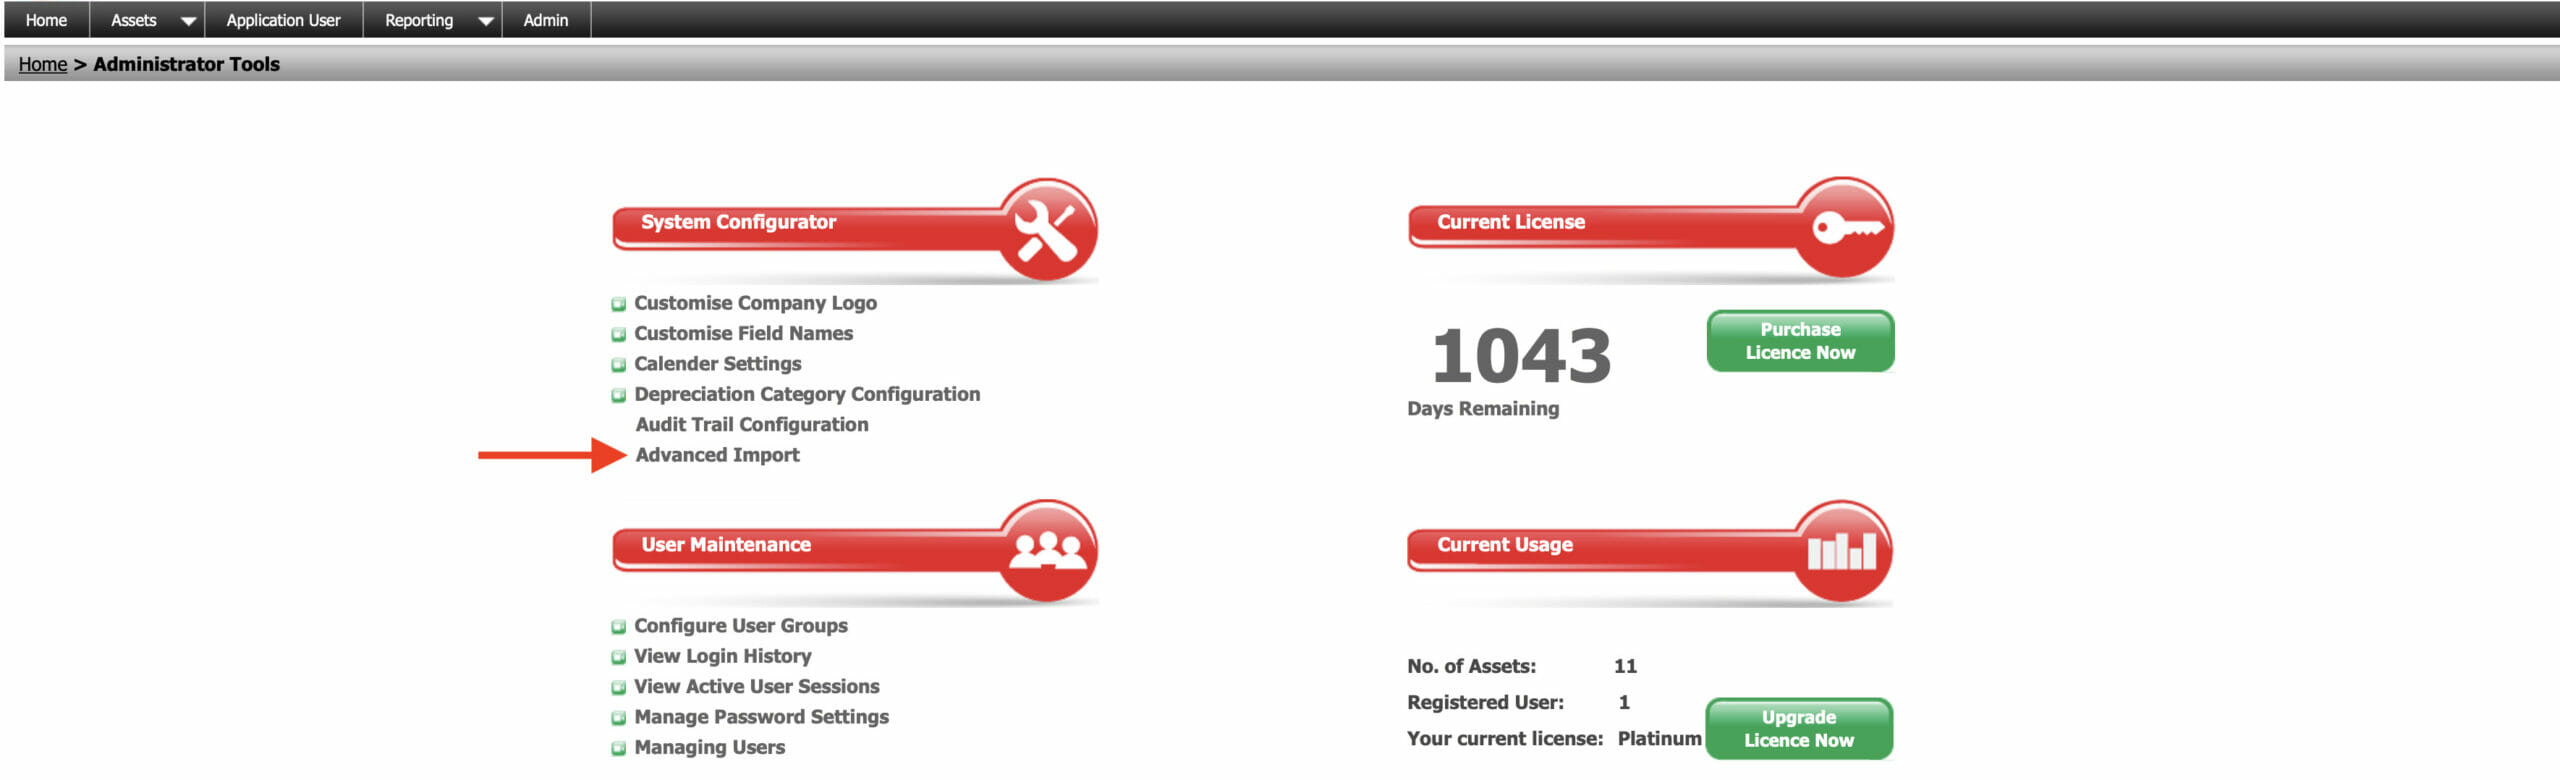
Next, click on Advanced Import.
On this screen there is a link to download the Advanced Import Template. Click the link and download the template.

The template is a csv file. It can be opened with Microsoft Excel, Open Office, or any other program capable of editing csv files. It is important to note that you cannot add, edit, or remove any of the information in line #1. Do not change the order of the columns or remove any columns. Any changes to the structure of the template will cause the import to fail.
Line #2 of the template is intended to provide more descriptive information about the type of data being requested for that column. This line should also be left intact and not removed or edited.
Line #3 offers a sample asset setup to show what the expected data entries should look like. This line should be removed prior to import, otherwise the sample asset will be imported into your system.

The following is a breakdown of each column including whether is it required or optional.
| Column | Required | Description |
|---|---|---|
| id_type | Yes | This ID matches the barcode on the asset |
| reg_date | No | Ex: Barcode label, handwritten tag, etc. |
| asset_type | No | Asset Category: copy and paste a category that already exists in your system or enter new one |
| manufacturer | No | Manufacturer: copy and paste a manufacturer that already exists in your system or enter new one |
| model | No | Model number of the asset |
| item_description | No | Description of the asset |
| product_serial_no | No | Asset serial number |
| other_id | No | Additional ID number |
| other_id_type | No | Additional ID: copy and paste additional ID type that already exists in your system or enter new one |
| notes | No | Notes about the asset |
| asset_user | No | Name of the asset user |
| department | No | Copy and paste a department that already exists in your system or enter new one. Ex, IT, facilities, etc. |
| responsibility | No | Department head for the selected department |
| site | No | Copy and paste a site that already exists in your system or enter new one |
| loaned_to | No | If loaned, enter name of person loaned to |
| date_of_pat_test | No | Date of the last PAT test |
| tested_by | No | Name of the PAT tester |
| date_of_next_test | No | Next test date |
| asset_value | No | Asset initial value |
| audit_date | No | Asset audit date |
| audit_note | No | Audit notes |
| missing | No | Asset missing? Enter Yes or No |
| Status | Yes | Enter In Use or Disposed |
| disposal_date | No | If disposed, enter disposal date |
| disposal_note | No | If disposed, enter disposal notes |
| AssetUDF1 | No | Optional, if using UDF fields |
| AssetUDF2 | No | Optional, if using UDF fields |
| AssetUDF3 | No | Optional, if using UDF fields |
| AssetUDF4 | No | Optional, if using UDF fields |
| AssetUDF5 | No | Optional, if using UDF fields |
| Loan_date | No | If loaned, enter loan date |
| Audited_by | No | Copy & paste a username that already exists to link to that user, or enter a new one |
You may enter as many assets as needed to the spreadsheet. Each line on the spreadsheet represents a new asset. Once the spreadsheet is complete save it as a csv file and then navigate back to the Advanced Import area of the Admin section. Click on Choose File, find the file on your hard drive, then select it. Next click Import. This will begin the import process.

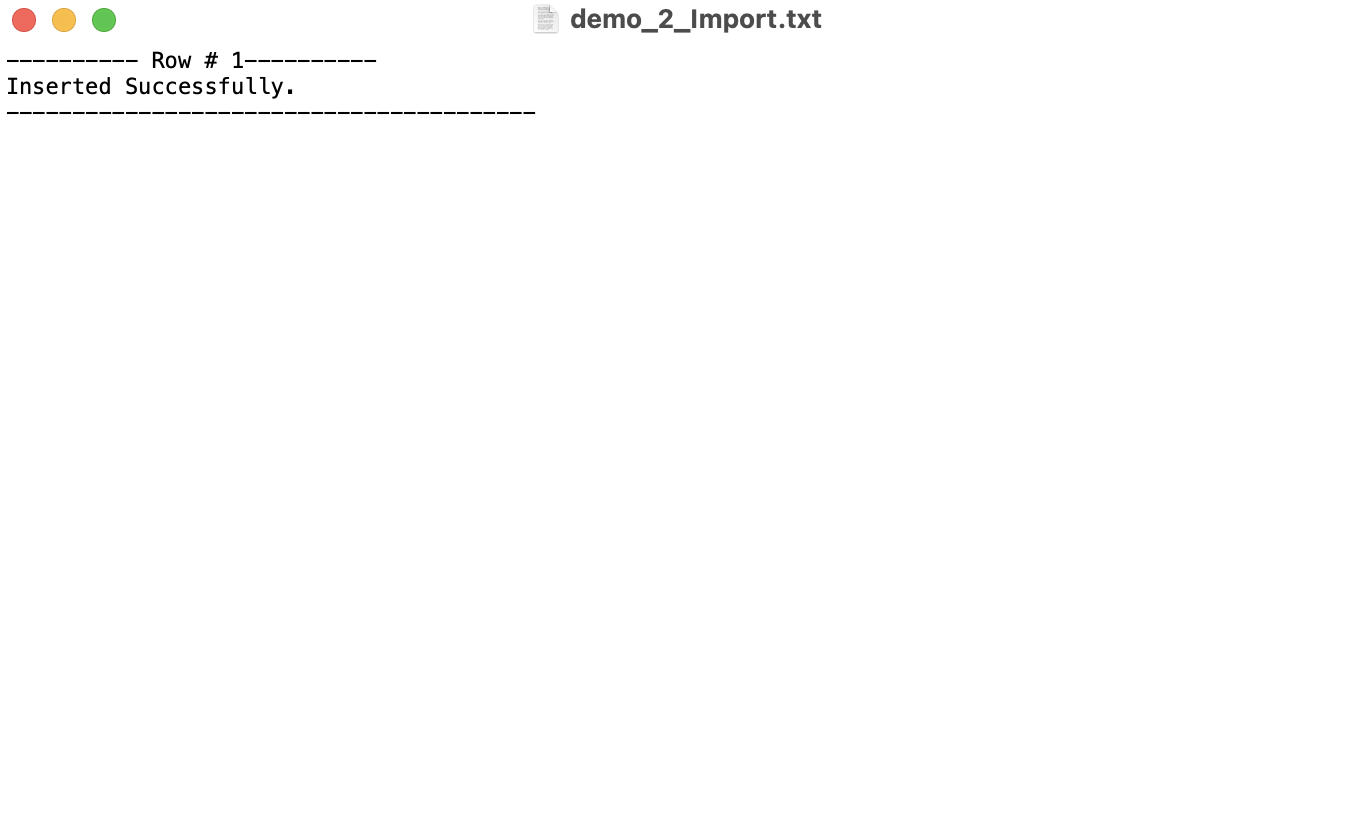
The import timing can range from a few seconds to several minutes depending upon how many assets are included on the import sheet. Do not refresh or leave the page until the import has finished processing. When finished, a success or error message will be displayed at the top of the screen. Click on View Log to view the processing log and see how many assets were created successfully and also to see the cause of any errors.